Hummingbirds are some of the hardest birds to photograph. They’re small, they move at incredible speeds, and they almost never sit still. But you don’t need professional gear or a wildlife studio to get great shots. With a little patience and a few smart choices, you can capture stunning hummingbird photos right from your patio.
Here’s how to set yourself up for success.
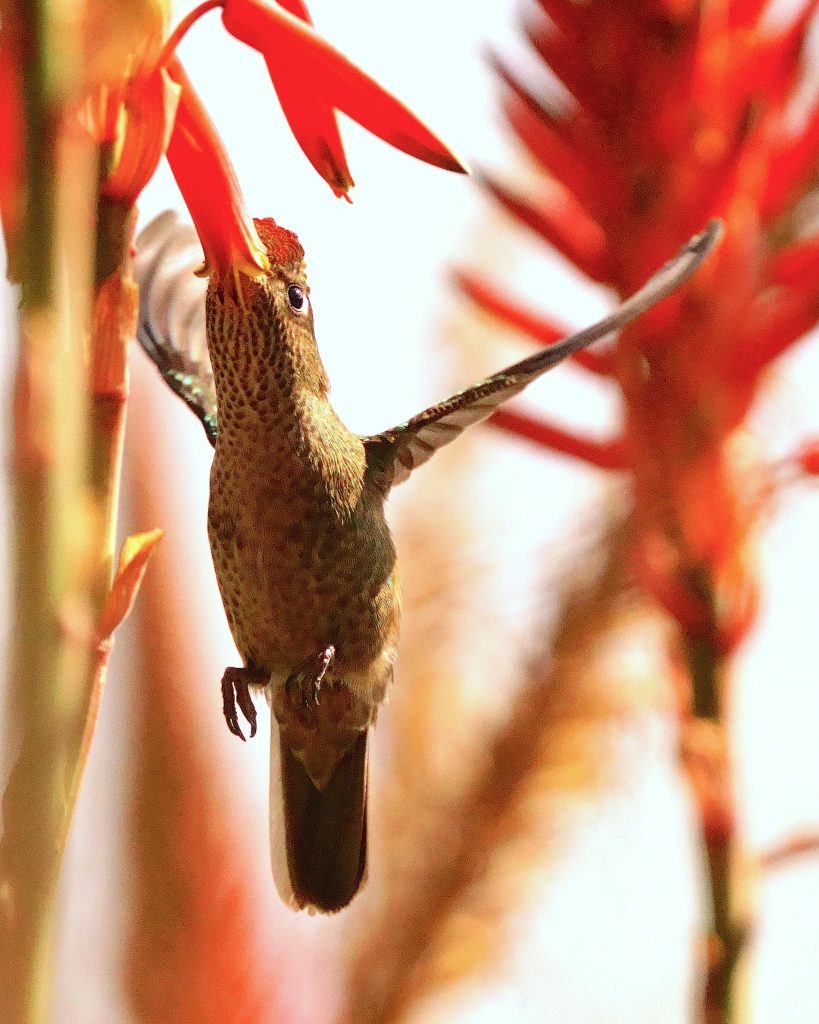
Set the Stage Before You Pick Up the Camera
The best hummingbird photos rarely happen at the feeder itself — feeders are obvious, plastic, and break the natural look of the photo. Instead, position a beautiful flowering plant or a small bare branch within a few feet of the feeder. Hummingbirds love to perch nearby between sips, scanning for rivals. That perch is where the magic happens.
Pay attention to your background. A cluttered fence or shed makes for a busy photo. A solid color, soft greenery, or open sky behind your subject will make the bird pop.
Use the Right Light
Hummingbird feathers are iridescent, meaning their colors come alive only when light hits them at the right angle. Early morning and late afternoon light is your best friend — softer, warmer, and angled. Position yourself so the sun is behind you and lighting the bird from the front. A male hummingbird’s throat that looks black in shade will explode with red, magenta, or purple when the light is right.
Camera Settings That Work
- Shutter speed: 1/2000 second or faster to freeze the wings. For artistic motion blur on the wings, try 1/500.
- Aperture: f/5.6 to f/8 keeps the bird sharp while blurring the background.
- ISO: Start at 400–800 in good light. Don’t be afraid to push higher — a noisy photo beats a blurry one.
- Focus mode: Continuous autofocus (AI Servo on Canon, AF-C on Nikon and Sony).
- Burst mode: Always on. You’ll throw away most shots, and that’s fine.
Phone Photography Tips
Modern phones can take surprisingly good hummingbird photos, especially with these tricks: tap and hold to lock focus on the perch where you expect the bird to land, use burst mode, and shoot in good natural light. Pro mode (if your phone has it) lets you push shutter speed higher. The closer your phone is to the action, the better — consider a small tripod a few feet from a perch.
Be Patient and Be Still
Hummingbirds get used to people quickly, but only if you don’t make sudden moves. Sit in one spot, stay quiet, and let them come to you. Many photographers swear by sitting near the feeder for fifteen or twenty minutes before shooting, just to let the birds settle. Once they accept you as part of the scenery, they’ll fly within a few feet of your camera.
What to Avoid
- Don’t use flash. It can startle the birds and may even harm their eyes at close range.
- Don’t chase or follow them around the yard. Stay put.
- Don’t rearrange their world right before shooting — give them a day or two to get used to a new perch.
- Don’t crop too aggressively. Better to get closer than to lose detail in editing.
The best hummingbird photographers aren’t the ones with the fanciest gear — they’re the ones who know their birds. Spend time watching how the hummingbirds in your yard move, where they perch, and when they visit. Once you understand their patterns, the photos almost take themselves.